Как Настроить WiFi Роутер
Для настройки роутера Xiaomi Mi WiFi 3 на компьютере с Windows 10 потребуется войти в панель администратора по следующим адресам — http://192.168.31.1 или miwifi.com. Инструкция окажется актуальной и для соседей по модельному ряду — удешевленной версии 3C, самой продвинутой 3G, а также для более ранних моделей — Mi Nano и Mi Mini. При многочисленных достоинствах популярного китайского производителя у Wi-Fi маршрутизаторов Xiaomi также имеется один весьма существенный недостаток — отсутствие адаптации под зарубежных пользователей.
В особенности это характерно для самых «свежих» моделей, появившихся на рынке потребительской электроники относительно недавно. При заходе в настройки такого устройства можно увидеть полностью китайский интерфейс с характерными значками-иероглифами. У большинства новых обладателей роутеров Xiaomi, не владеющих китайским, обычно возникают проблемы именно при первом подключении. Ниже мы наглядно покажем пошаговый процесс настройки маршрутизатора Xiaomi Mi WiFi Router для трех его версий — 3, 3G и 3C.
Подключение роутера к компьютеру
Для начала сделаем два очевидных шага — подключим кабель Интернет-провайдера к порту WAN (он выделен синим цветом) и установим в собственное гнездо штекер от подключенного к электрической сети блока питания. При включении без предварительной настройки маршрутизатор начинает раздавать Wi-Fi соединение без требования пароля, поэтому подключиться к нему можно как по кабелю (LAN — Ethernet), так и «по воздуху». В том случае, если устройство приобреталось «с рук» и уже было в использовании, рекомендуется провести сброс до заводских настроек. Для этого достаточно воспользоваться булавкой, зажав на включенном роутере кнопку Reset.
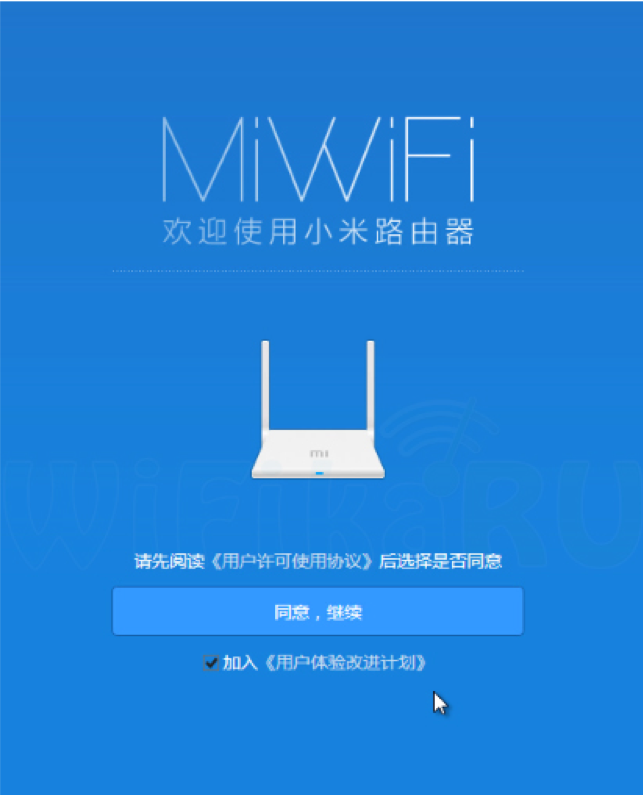
Важно убедиться, что в настройках «Центра управления сетями и общим доступом» операционной системы включено автоматическое получение IP и параметров DNS. Только в этом случае для доступа в панель администратора можно по выбору использовать адреса 192.168.31.1 или miwifi.com. Перейдя на страницу авторизации, ставим галочку и жмем кнопку с иероглифами.
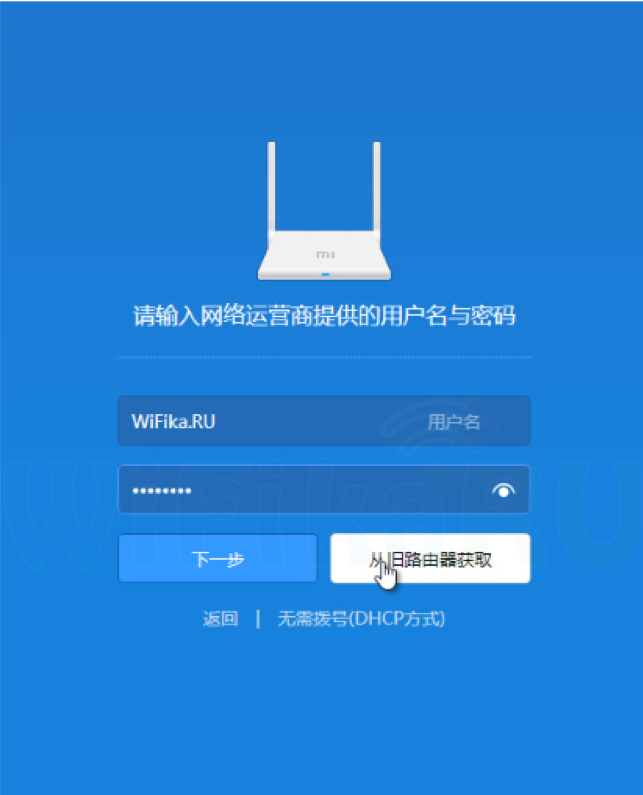
Маршрутизатор самостоятельно определит существующий тип подключения к глобальной сети. Если используется тип подключения PPPoE, тогда потребуется ввести параметры для доступа — логин и пароль.

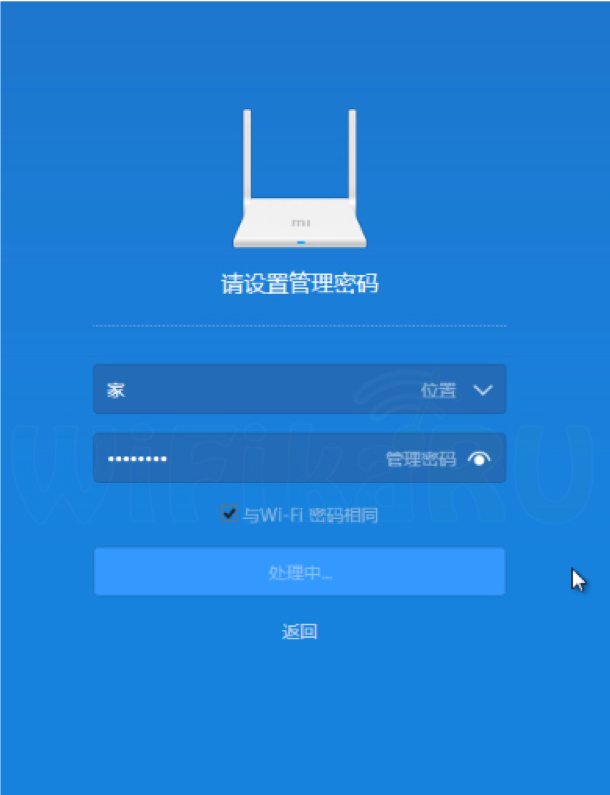
В случае подключения по DHCP (когда на ПК или роутере не нужны специальные настройки), выбираем этот тип, кликнув по соответствующему пункту в меню. В следующем окне устанавливаем пароль для входа в панель администратора и подтверждаем действие, нажав кнопку.
Теперь нужно выбрать имя для своей Wi-Fi сети и придумать надежный пароль (от 8 символов). Подтверждаем, нажав правую кнопку.
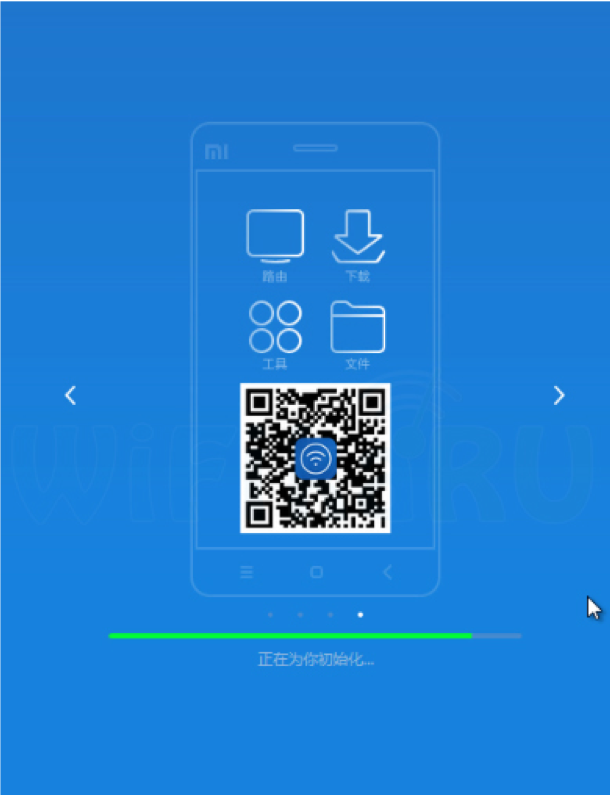
Для применения заданных параметров потребуется перезагрузка маршрутизатора. В следующем окне настроек приложение показывает QR код, отсканировав который можно загрузить мобильное приложение.
После установки имени сети и пароля к ней роутер начинает раздавать Интернет на все подключенные устройства.
Настройка работы маршрутизатора
Интерфейс панели администратора выполнен полностью на китайском, поэтому нам потребуется его русификация. В Google Chrome для получения вполне корректного перевода достаточно пары кликов мышкой. В других браузерах потребуется дополнительное расширение-переводчик. Основная страница панели администратора отображает текущую сводку данных о работе сети. Здесь можно увидеть список подключенных устройств, объём использованного трафика, степень загрузки ЦП и оперативной памяти. Следует заметить, что у конкурирующих решений из бюджетного сегмента (к примеру, от Asus или TP-Link) ничего подобного не предусмотрено.
Для контроля за расходом трафика отдельными устройствами предусмотрена закладка «Оборудование». В списке подключенных устройств можно быстро отключить любого из пользователей. Закладка «Настройки интернет» позволяет задать конфигурацию подключения к провайдеру. Здесь можно установить скоростной предел для WAN порта, клонировать MAC-адрес или переключить устройство в режим WiFi-репитера. В разделе меню «Расширенные настройки» открывается доступ к переадресации портов. Здесь же можно вручную прописать статический IP-адрес, задать параметры DDNS, UPnP и др.
Важно: стоковая прошивка роутера не поддерживает протоколы L2TP и PPTP. Это говорит о невозможности подключить устройство пользователям Интернет-провайдера Билайн. Решением проблемы может послужить установка промежуточного проводного маршрутизатора, непосредственно к которому уже можно подключить роутер Xiaomi.
Работать с настройками маршрутизатора через ПК не всегда удобно, а иногда и невозможно вообще по какой-либо причине. Простой и удобной альтернативой в этом случае станет приложение для смартфона IP Tools со встроенной функцией «Router Setup» (или «Настройка роутера»). Утилита автоматически находит адрес страницы настройки маршрутизатора и позволяет легко управлять устройством без помощи специалиста.
How Setup WiFi Router
To configure the router Xiaomi Mi WiFi 3 on a computer with Windows 10 you will need to log into the admin panel at the following addresses - http://192.168.31.1 or miwifi.com. The instruction will be relevant for neighbors models in range - the cheaper version of 3C, the most advanced 3G, as well as for earlier models - Mi Nano and Mi Mini. With the numerous advantages of the popular Chinese manufacturer, Xiaomi Wi-Fi routers also have one very significant drawback - the lack of adaptation for foreign users.
In particular, this is characteristic of the “freshest” models that have appeared on the consumer electronics market relatively recently. When entering the settings of such a device, you can see a completely Chinese interface with distinctive hieroglyphic icons. Most new owners of Xiaomi routers who do not speak Chinese usually have problems with the very first connection. Below we will clearly demonstrate the step by step process of setting up the Xiaomi Mi WiFi Router for its three versions - 3, 3G and 3C.
Connecting the router to the computer
To begin with, we will take two obvious steps: we will connect the cable of the Internet provider to the WAN port (it is highlighted in blue) and install the plug from the power supply unit connected to the electrical network into its own socket. When you turn on without pre-setting, the router starts distributing a Wi-Fi connection without requiring a password, so you can connect to it via cable (LAN - Ethernet) and “over the air”. In the event that the device was purchased "from hands" and was already in use, it is recommended to reset to factory settings. To do this, just use the pin, holding the Reset button on the enabled router.
It is important to make sure that in the settings of the Network and Sharing Center, the operating system has automatic retrieval of IP and DNS parameters. Only in this case, you can optionally use the addresses 192.168.31.1 or miwifi.com to access the admin panel. Go to the login page, put a check mark and press the button with hieroglyphs.
The router will independently determine the existing type of connection to the global network. If the connection type is PPPoE, then you will need to enter the access parameters - login and password.
In the case of DHCP connection (when no special settings are needed on the PC or router), select this type by clicking on the appropriate item in the menu. In the next window, set a password to log in to the admin panel and confirm the action by clicking the button.
Now you need to choose a name for your Wi-Fi network and come up with a strong password (8 characters or more). Confirm by pressing the right button.
To apply the specified parameters, you will need to restart the router. In the next settings window, the application displays a QR code, which can be scanned by downloading a mobile application.
After setting the network name and password to it, the router starts distributing the Internet to all connected devices.
Setting up the router
The admin panel interface is made entirely in Chinese, so we need to translate it. In Google Chrome, a couple of mouse clicks are enough to get the correct translation. Other browsers will require an additional translator extension. The main page of the admin panel displays the current summary of network activity. Here you can see a list of connected devices, the amount of traffic used, the degree of CPU and RAM usage. It should be noted that competing solutions from the budget segment (for example, from Asus or TP-Link) do not provide anything like this.
To control the consumption of traffic by individual devices, the “Equipment” tab is provided. In the list of connected devices, you can quickly disconnect any of the users. The “Internet Settings” tab allows you to configure the connection to the provider. Here you can set the speed limit for the WAN port, clone the MAC address or switch the device to the WiFi repeater mode. In the Advanced Settings section of the menu, access to port forwarding is available. Here you can manually register a static IP address, set the DDNS, UPnP, etc. parameters.
Important: the stock firmware of the router does not support the L2TP and PPTP protocols. This indicates the impossibility of connecting the device to users of the Internet provider Beeline. The solution to the problem can be the installation of an intermediate wired router, directly to which you can already connect a Xiaomi router.
Working with router settings via a PC is not always convenient, and sometimes even impossible for any reason. A simple and convenient alternative in this case will be an application for the IP Tools smartphone with the built-in “Router Setup” function (or “Router Setup”). The utility automatically finds the address of the router configuration page and allows you to easily manage the device without the help of a specialist.